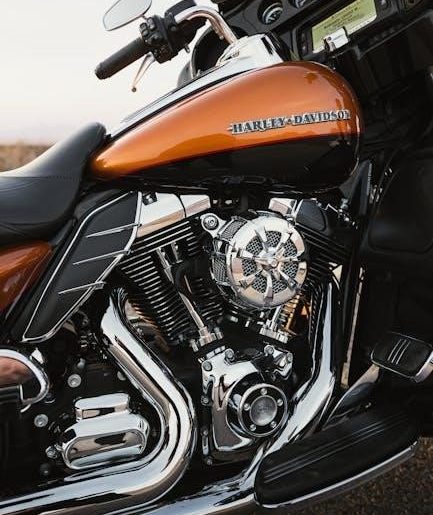
Harley Davidson wiring diagrams are essential tools for understanding and working with the electrical systems of these iconic motorcycles. Whether for repairs, customization, or troubleshooting, these diagrams provide a clear visual representation of the wiring layout, ensuring safety and efficiency. They are indispensable for both enthusiasts and professionals, offering detailed insights into the complex electrical circuits that power Harley Davidson bikes.
Importance of Wiring Diagrams for Repairs and Customization
Wiring diagrams are crucial for efficiently diagnosing and repairing electrical issues in Harley Davidson motorcycles. They provide a detailed roadmap of the bike’s electrical system, making it easier to identify components and their connections. For customization, diagrams help enthusiasts safely modify circuits without causing system-wide failures. By referring to these schematics, riders can avoid overloading circuits and ensure proper grounding, maintaining the bike’s reliability and performance. Whether troubleshooting or adding aftermarket accessories, wiring diagrams empower owners to work confidently and effectively.
Overview of Harley Davidson Electrical Systems
Harley Davidson electrical systems are intricate networks designed to power various components, from lighting and ignition to accessories and advanced electronics. These systems are structured to ensure reliability and safety, with circuits carefully organized to handle specific functions. Modern models incorporate complex wiring to support features like ABS, traction control, and infotainment systems. Understanding the hierarchy of these systems is essential for effective troubleshooting and customization. Wiring diagrams provide a visual breakdown of these circuits, enabling riders to identify components, trace connections, and diagnose issues efficiently, whether working on a classic model or a cutting-edge touring bike.

Types of Harley Davidson Wiring Diagrams
Harley Davidson wiring diagrams come in two primary types: factory diagrams, which are model-specific and detailed, and aftermarket diagrams, often more customizable. Both include color-coded wiring for clarity.
Factory vs. Aftermarket Diagrams
Factory wiring diagrams are created by Harley Davidson for specific models and years, offering precise details for repairs and customization. They are typically found in official service manuals or on Harley Davidson’s web portal. Aftermarket diagrams, while less detailed, are often more affordable and accessible, catering to enthusiasts. These diagrams may lack the specificity of factory versions but still provide a useful guide for common electrical systems. Both types are invaluable for diagnosing issues or planning modifications, ensuring riders can work safely and effectively on their bikes.
Color-Coded Wiring Diagrams forEase of Use
Color-coded wiring diagrams simplify the complexity of Harley Davidson electrical systems, making it easier to identify circuits and components. Each color represents a specific function, such as power, ground, or accessory wires, reducing confusion. These diagrams are particularly useful for tracing wiring routes and diagnosing issues. By standardizing colors, Harley Davidson ensures consistency across models, helping riders and technicians work more efficiently. This visual clarity is essential for safe and accurate electrical work, whether performing routine maintenance or custom modifications.

How to Read a Harley Davidson Wiring Diagram
Understanding symbols and color codes is key to interpreting Harley Davidson wiring diagrams. Tracing circuits and identifying components becomes straightforward with practice, ensuring accurate repairs and modifications.
Understanding Symbols and Abbreviations
Harley Davidson wiring diagrams use specific symbols and abbreviations to represent components and connections. Common symbols include circles for switches, rectangles for relays, and grounds marked by a down-pointing arrow. Abbreviations like “IGN” for ignition or “BAT” for battery simplify the layout. Colors also play a role, with red often indicating hot wires and black for grounds. Familiarizing yourself with these symbols and codes is crucial for accurately interpreting the diagrams, ensuring safe and efficient electrical system repairs or modifications. Proper understanding prevents errors and enhances troubleshooting effectiveness.
Identifying Components and Their Connections
Harley Davidson wiring diagrams detail each component and its connections, allowing users to trace circuits and understand how systems interact. Components are labeled clearly, such as “IGN” for ignition or “BAT” for battery, and their locations are often cross-referenced. Wires are shown connecting components, with arrows indicating flow direction. This visualization helps diagnose issues, such as a faulty relay or broken circuit, and plan modifications. By following the diagram, enthusiasts can pinpoint where components are located and how they connect, ensuring accurate repairs and customizations.

Troubleshooting with Wiring Diagrams
Wiring diagrams are crucial for diagnosing electrical issues in Harley Davidson motorcycles. They help identify faulty components, trace circuits, and pinpoint connections, ensuring accurate and efficient repairs.
Common Electrical Issues and Their Solutions
Common electrical issues in Harley Davidson motorcycles include blown fuses, faulty connections, and malfunctioning components. Using wiring diagrams, riders can trace circuits to identify problems. For example, if a headlight fails, the diagram helps locate the relevant circuit and test components like bulbs, fuses, or connectors. Ensuring proper grounding and avoiding overloaded circuits are key solutions. Replacing damaged wires and checking for corrosion also resolve many issues. Referencing diagrams ensures repairs are precise, minimizing downtime and enhancing safety.
Using Diagrams to Diagnose Circuit Problems
Wiring diagrams are invaluable for diagnosing circuit issues in Harley Davidson motorcycles. By tracing the circuit path, riders can identify faulty components or connections. For example, if a turn signal fails, the diagram helps locate the relevant circuit, including switches, relays, and bulbs. Color-coded wires simplify identification, while symbols clarify component functions. Testing continuity and voltage drop using the diagram ensures accurate troubleshooting. This methodical approach saves time and prevents guesswork, helping riders resolve issues efficiently and safely.

Sources for Harley Davidson Wiring Diagrams
Harley Davidson wiring diagrams are available through official resources like their web service portal and service manuals. Third-party websites, forums, and paid options also offer detailed PDF downloads.
Official Harley Davidson Resources
Harley-Davidson provides detailed wiring diagrams through their official web service portal, ensuring accuracy and reliability. These diagrams, identical to those in dealer-purchased service manuals, cover entire systems or specific circuits. For instance, the 2021 Softail and V-Rod models have comprehensive diagrams available. Users can access PDF downloads for various models, including the FLHTKSE and XL Sportster. Official resources are the primary source for precise wiring information, essential for safe and efficient electrical work on Harley-Davidson motorcycles.
Third-Party Websites and Forums
Third-party websites and forums offer extensive collections of Harley-Davidson wiring diagrams, often shared by enthusiasts and mechanics. Platforms like Box.net host user-contributed diagrams, while forums provide discussions and links to specific models. For example, the 1977 Shovelhead and 2001 GSXR 1000 K1 diagrams are available through community efforts. These resources are invaluable for rare or older models, fostering collaboration and knowledge sharing among Harley-Davidson enthusiasts. They complement official sources, offering diverse solutions for wiring needs.

Tips for Working with Wiring Diagrams
Tips for Working with Wiring Diagrams
When working with Harley-Davidson wiring diagrams, always use color-coded guides for clarity and accuracy. Ensure you have the correct tools, such as wire strippers and multimeters, to safely modify or repair circuits. Referencing the official service manual or downloadable PDF diagrams ensures you have the most accurate information for your specific model. Prioritize proper grounding techniques and avoid overloading circuits to maintain electrical system integrity. Organize your workspace and label wires as you go to minimize confusion and ensure a smooth project flow.
Best Practices for Safe Electrical Work
Safety is paramount when working with Harley-Davidson wiring diagrams. Always disconnect the battery before starting any electrical work to prevent short circuits or accidental power-ons. Use a multimeter to test wires and circuits for voltage and connectivity. Wear protective gear, including gloves and safety glasses, to shield against electrical shocks or sparks. Ensure all tools are insulated and appropriate for the task. Properly ground components to avoid damage or fire hazards. Never overload circuits, and always refer to the wiring diagram for accurate connections. Following these practices ensures a safe and successful electrical project.
Tools and Materials Needed for Wiring Projects
Effective wiring projects on Harley-Davidson motorcycles require the right tools and materials. Essential tools include a multimeter for testing voltage and continuity, wire cutters and strippers for preparing wires, and insulated pliers for gripping components. A soldering iron and heat shrink tubing ensure secure and durable connections. Materials like high-quality copper wire, circuit breakers, and fuses are crucial for maintaining electrical integrity. Additionally, a wiring diagram specific to your model is indispensable for accurate reference. Properly equipping yourself with these tools and materials ensures efficient and safe electrical work on your Harley-Davidson.

Common Mistakes to Avoid
Overloading circuits and using incorrect wire sizes are common mistakes that can lead to electrical failures. Proper grounding techniques are essential to prevent such issues.
Overloading Circuits and Incorrect Wire Sizes
Overloading circuits is a common mistake that can lead to electrical failures and safety hazards. Adding too many accessories without upgrading the wiring system can strain the circuit, causing overheating or damage. Incorrect wire sizes further exacerbate the issue, as thinner wires may not handle increased current loads, leading to inefficiency or even fires. Always refer to the wiring diagram to ensure proper wire sizing and avoid circuit overloads. Consulting a professional is advisable if unsure about modifications to maintain safety and performance.
Neglecting Proper Grounding Techniques
Neglecting proper grounding techniques is a critical mistake when working with Harley Davidson wiring. Improper grounding can lead to electrical malfunctions, intermittent issues, and potential safety hazards. Grounding ensures a safe path for current to flow, preventing damage to components and reducing the risk of electrical shocks. Always consult the wiring diagram to identify correct grounding points and verify connections. Inadequate grounding can result in unstable circuits and long-term damage to the motorcycle’s electrical system, emphasizing the importance of adhering to proper grounding practices during repairs or customizations.
Additional Resources
Official Harley-Davidson service manuals and third-party forums offer downloadable wiring diagrams in PDF format, providing comprehensive guides and expert advice for enthusiasts and professionals alike.
Recommended Service Manuals and Guides
Official Harley-Davidson service manuals provide detailed wiring diagrams and repair procedures, ensuring accuracy and safety. These manuals are available for specific models, such as the 2021 Softail or 2003 VRSCE. Additionally, third-party guides and forums offer community-contributed diagrams and tips. Many enthusiasts recommend purchasing official manuals for their comprehensive coverage of electrical systems. For DIY projects, these resources are invaluable, offering step-by-step instructions and troubleshooting advice. Always use these guides to ensure safe and efficient electrical work on your Harley-Davidson motorcycle.
Online Communities for Support and Advice
Online forums and communities are invaluable resources for Harley-Davidson enthusiasts seeking wiring diagram advice. Platforms like Box.net and specialized forums host shared diagrams, troubleshooting tips, and model-specific guides. Enthusiasts often post custom solutions and modifications, while experts provide detailed explanations. These communities offer personalized advice, helping users overcome unique challenges. For instance, discussions on wiring modifications for models like the 2020 FLHTKSE or 2018 Harley-Davidson are common. Interactive forums ensure collaborative problem-solving, making them essential for safe and efficient electrical work on your motorcycle.
